The development of many printing processes has now made lives easier by adding a more elegant look to it with different techniques and designs, one of these technologies includes a process called hydrographic printing.
It’s an excellent process in which you have very limited boundaries of giving your imagination wings, you could 3D designs or animated logos to your desired surfaces either for the giggles or if you’re actually planning to start a small business based on printing your own hydrographic film.
An increase in the technology and production through hydro-dipping has been seen since there was a rise in people’s request in production of their customized hydrographic films, however it was expensive, needed a great budget plan and took longer periods of about 1-2 months to finish the work.
Well, that’s only the case for big companies who can pay enough, but what about the smaller ones with the demand? This article explains the steps and advantages of hydrographic film printing obviously along with its con list to help you decide.
Advantages of hydrographic film printing
However, usually they’re made for attracting customer’s attention towards your shop. They can totally increase the product value giving spaces for the most benefits for your small business.
Disadvantages of hydrographic film printing
What kind of printer is required for hydrographic filming?
People naturally want to know if their current printer will suffice, or if they are considering getting a new printer, whether it will deliver the necessary results or not, since the printers might actually be quite expensive to purchase.
There are three types of printers (usually inkjet) that can be used for your suitable purpose, solvent, pigment-based and latex. The ones that must be avoided should be dye-based and sublimation along with laser printers as they might bring many complications in the user’s task.
Solvent inks:
Advantages – Films are ready to dip right after printing, with no requirement for a topcoat before dipping.
Disadvantages – The initial printer cost more than $20,000, it has an awful odour, and it requires a lot of maintenance.
Latex inks
Advantages – Films are ready to dip right after printing, with no requirement for a topcoat before dipping.
Disadvantages – The initial printer cost more than $8,000.
Pigment inks
Advantages – While initial printers can cost anywhere from $300 to $5,000, there are a variety of printer options available.
Disadvantages – After printing, you must apply a topcoat (also known as Activator A).
What are the materials needed for printing hydrographic film?
The three main materials are :
- Inkjet printer
- Activator
- Hydrographic film
How to print on hydrographic film?
- Make sure you have all of the items you’ll need for bespoke hydrographic film printing ready.
- To use your inkjet printer, connect your computer to it.You can link your computer to your design using your own inkjet printer by following the instructions in the manual.
- On the computer, scale your photograph to the appropriate size.Set the image size to the size you wish to print in reality.
- Check the printer and make sure the ink colour is correct. Before printing the design on the blank hydrographic film, print a test page on regular paper to ensure that the colour is correct; if it isn’t, you’ll need to modify your printer or replace the ink.
- By using a hydro dip printer, print your design onto the blank hydro dip film.This is the most important step: print your design on the blank film and verify the colour; if there are any issues, you must stop and double-check the printer.
- On the blank film, let the ink dry.Because the ink is still wet after printing, you must wait for it to dry naturally.
- On the blank water transfer printing film that has been produced, apply activator A.After applying activator A to the printed blank WTP film, which can be dipped on the item using the water transfer printing technique as conventional hydrographic film, activator A is employed to protect the ink.
- Activator A is used to dry the printed blank hydro dip film.
- Rolling your blank hydrographic dipping film that has been printed
This is the last stage; you may package your bespoke hydrographic film, which is now a standard hydro dipping film that you can use to do hydro dipping for this design.
FAQs:
- Can you use water transfer printing at home? Spray the proper base coat on the part before painting it. The item is submerged in the dipping container, with the film floating on top. Remove any residue from the dipping step by rinsing the part. Spray a clear coat to finish the piece.
- What is the activator used in the process of hydrographic printing? Xylene, isobutanol, butyl, methyl acetate, and methyl ethyl ketone are typical components in activators. Fast-acting activators substitute ethyl isobutyl ketone for methyl ethyl ketone.
Links for some printers:
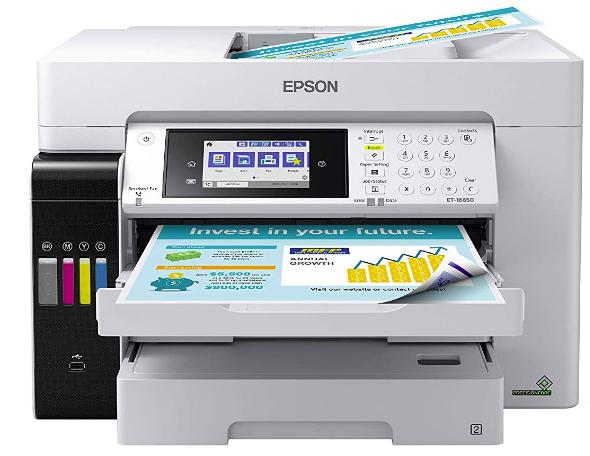
Epson EcoTank Pro ET-16650 Wireless Wide

- Format Color All-in-One Supertank Printer.
- Scanner, Copier, Fax and Ethernet.
Canon imagePROGRAF PRO Wireless Wide

- Format Printer, Prints up to 13″X 19″, 3.0″ LCD Screen.
- Profession Print & Layout Software and Mobile Device Printing, Black
Epson WorkForce WF-7720 Wireless Wide

- Format Color Inkjet Printer with Copy, Scan.
- Fax, Wi-Fi Direct and Ethernet, Amazon Dash Replenishment Ready
Conclusion:
Hydrographic printing, also known as water transfer printing, is a method of applying designs to a variety of substrates using specialized inks and coatings.
